Core Concepts
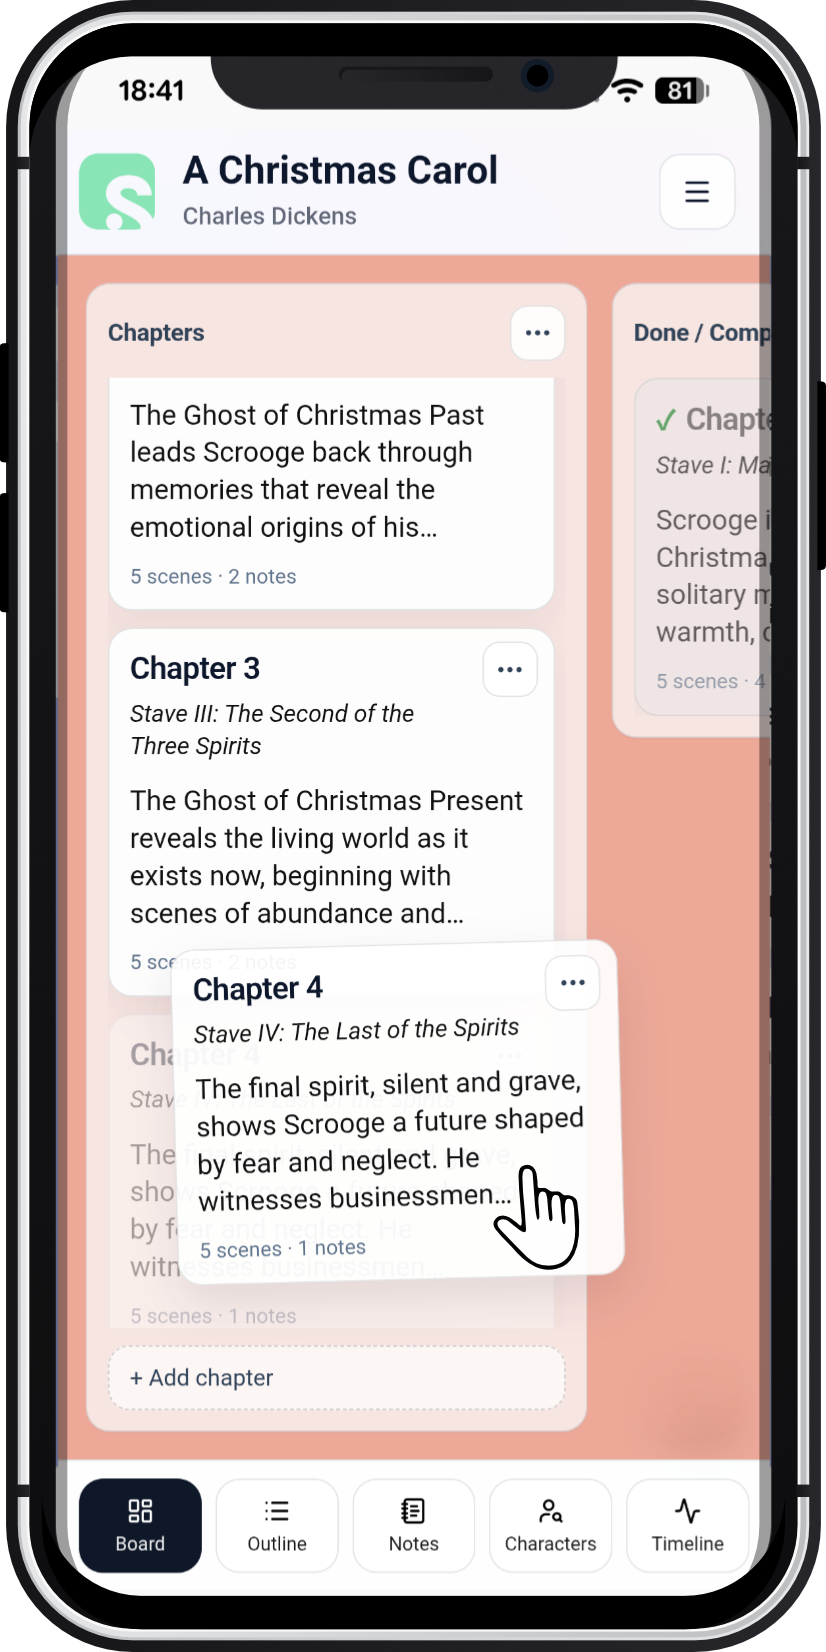
Chapters and Scenes
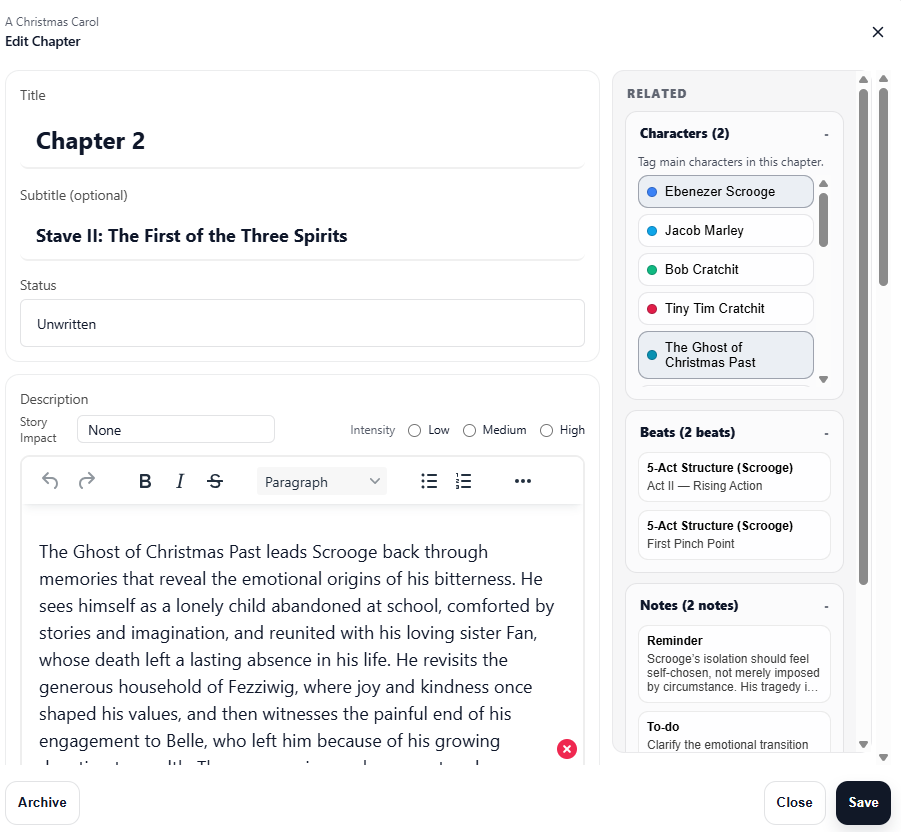
Scryla organises stories into chapters and scenes so you can plan structure clearly.
Chapters can contain:
• A title
• An optional subtitle
• A short overview
• Scenes pertaining to the chapter
Scenes can be added within chapters and reordered freely as your structure changes.
You can also mark scenes as complete or archive them if you decide to change direction.
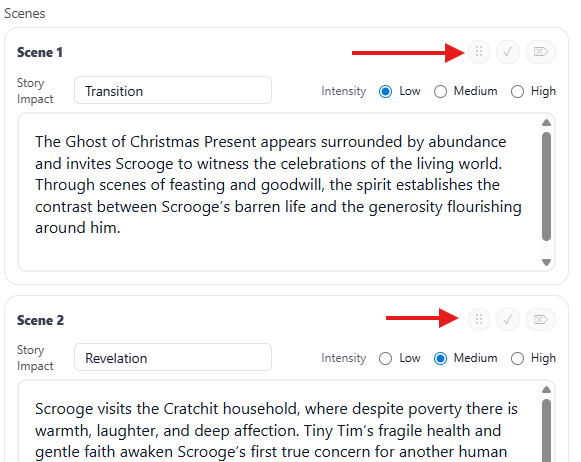
Story Impact and Intensity
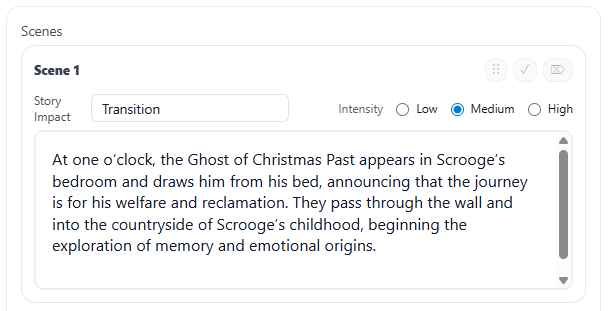
Scenes in Scryla can include two optional narrative signals:
Story Impact: the type of narrative event happening in the scene
(for example: Revelation, Confrontation, Fallout).
Intensity: a rough indicator of how dramatically significant the moment is
(for example: Low, Medium, High).
These signals help you visualise pacing and structure, especially when using Timeline View.
Archiving vs Deleting
In Scryla, items are archived before they can be permanently deleted. This includes chapters, scenes, notes, and other project elements.
This two-step process helps protect your work from accidental deletion.
Because writing projects often evolve over time, ideas that seem unnecessary today may become useful again later. Archiving allows you to safely remove items from your active workspace without losing them permanently.
Archiving an Item
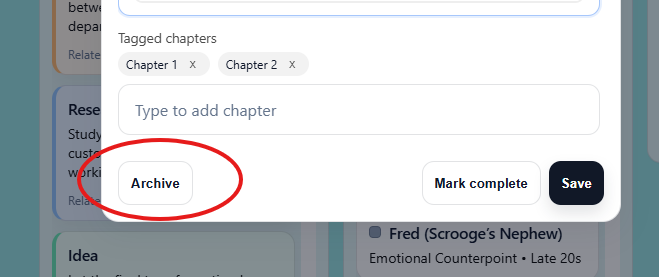
When you archive an item:
-
It is removed from the active board or view
-
It is stored safely in the Archive drawer
-
It can be restored at any time
This makes archiving ideal for:
-
Alternate scenes
-
Removed plot ideas
-
Draft notes you may want later
Permanently Deleting an Item
If you are sure you no longer need something, you can permanently delete it from the Archive.
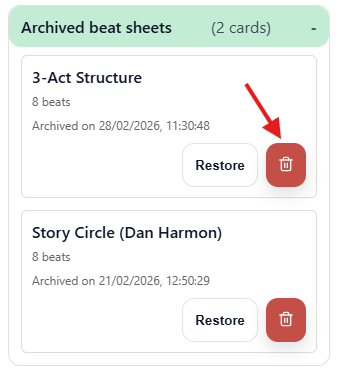
To do this:
-
Archive the item.
-
Open the Archive drawer from the Project menu.
-
Locate the archived item.
-
Select Delete permanently and then confirm your choice.
Once permanently deleted, the item cannot be recovered.
Why Scryla Uses Archiving First
Many writing tools allow immediate deletion, which can lead to accidental loss of work.
Scryla deliberately uses an archive-first approach to make it easy to:
-
Experiment with ideas safely
-
Remove clutter from your board
-
Restore earlier versions of your work if needed
This allows writers to stay organized without risking the loss of important material.
Many writers use the Archive as a temporary “idea graveyard” where unused scenes and notes can be kept in case they become useful later.
Reordering Chapters and Scenes
Scryla allows you to easily reorganize your story by dragging and dropping chapters and scenes.
This makes it simple to experiment with story structure as your outline evolves.
Reordering Chapters
To change the order of chapters:
-
Open your project in Board View.
-
Locate the Chapters column.
-
Click and drag a chapter card.
-
Drop it in the new position.
All scenes inside the chapter will move with it automatically.
Note: on mobile, tap and hold a chapter with your finger in order to move it.
Reordering Scenes
Scenes can also be rearranged within a chapter.
To move a scene:
-
Open the chapter containing the scene.
-
Click and drag the scene card's drag handle (the six dots on the top-right of each scene).
-
Drop it in the desired position.
This allows you to quickly test different story flows without rewriting or copying content.
Note: If you're planning a large structural change, consider archiving scenes instead of deleting them so you can restore them later if needed.