Scryla Studio
Plot, plan and manage your fiction
- Getting Started
- Creating Your First Project
- Understanding the Board View
- Uploading covers, manuscripts and other assets
- Core Concepts
- Views & Navigation
- Characters & Notes
- Exporting Your Outline
Getting Started
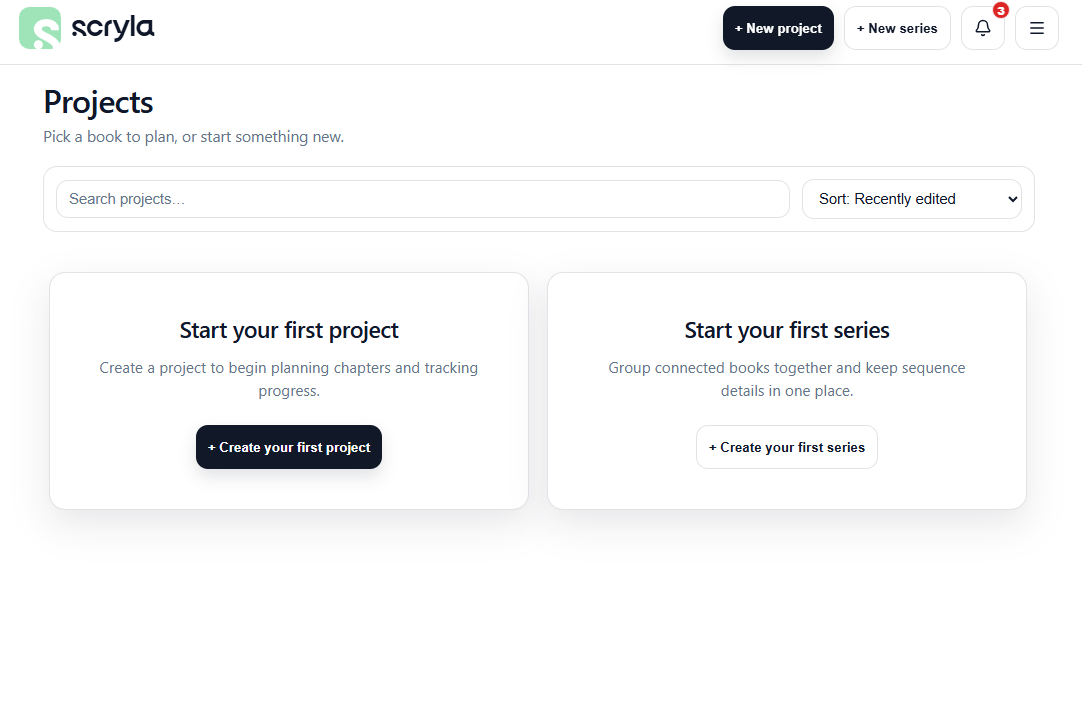
Creating Your First Project
A project in Scryla represents a single book, novella, or writing project.
To create one:
-
Click New Project on your dashboard.
-
Enter a project title.
-
(Optional) Add series information if the book belongs to a series.
-
Choose a board background colour if you wish.
Once created, your project opens to the Board View, where you can begin adding chapters, scenes, notes, characters, and more.
Projects can be archived safely if you want to hide them from your dashboard without deleting them.
Watch the video below for a full rundown of creating your first project, or head back to the main Documentation page for more guides.
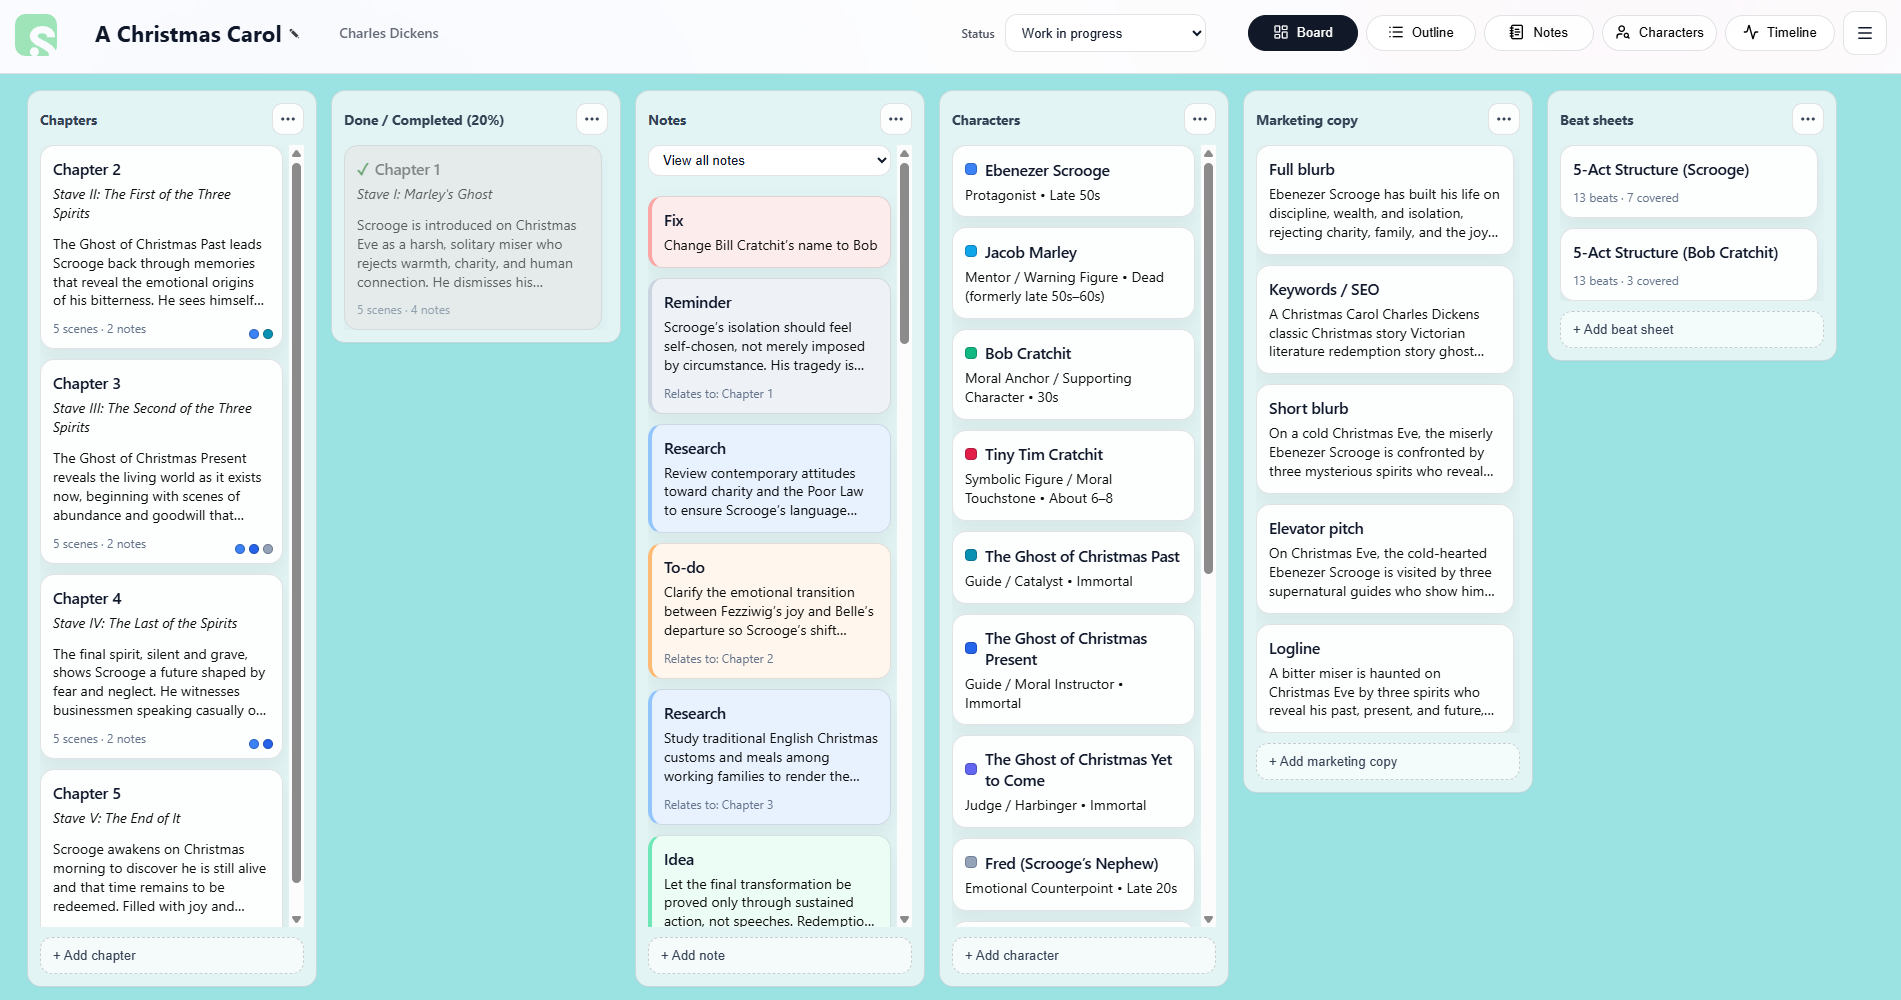
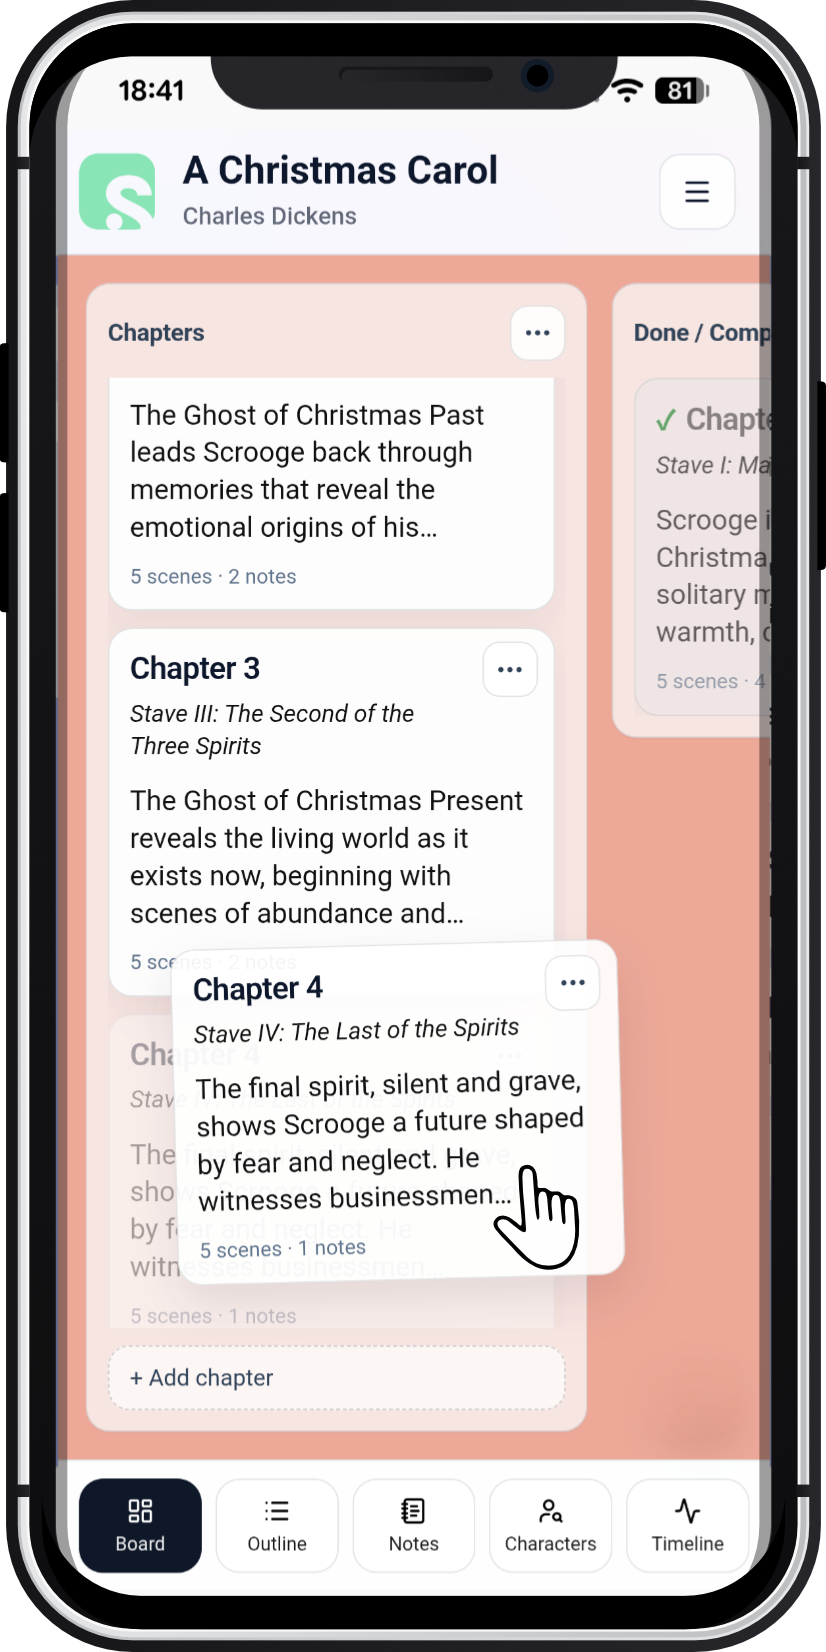
Understanding the Board View
The Board View is the main workspace in Scryla.
Each column represents a different type of planning element, such as:
• Chapters
• Scenes
• Notes
• Characters
• Marketing copy
• Beat sheets
You can drag and reorder items within each column to keep your project organised as your story evolves.
Cards can be archived instead of deleted, allowing you to keep alternate ideas without losing them.
Note: If you do wish to delete a card, you must archive it first. Scryla protects against accidental deletion so that you never lose something you later need access to. Cards can sit safely in your archive, or you can permanently delete them.
Uploading covers, manuscripts and other assets
You can upload your book's cover, keep track of manuscript drafts, add character art, and store your research documents all inside Scryla for Authors.
Note: audio and video files are not supported, but you can upload images and documents to your project. See below for a complete list of supported filetypes.
Supported file types by location:
Manuscripts: Use the Manuscripts area to upload and store your working drafts as well as your final version. Marking a manuscript as "Final" pins it to the top of the list.
- .doc
- .docx
- .txt
- .rtf
- .md
- .epub
- .mobi
- .kpf
- .kcb
Note attachments: Use the Notes area to upload research files, maps, studies and more.
- .doc
- .docx
- .txt
- .rtf
- .md
- .jpg
- .jpeg
- .png
- .webp
Character profile image: You can upload an image to each character, whether that's character art or an avatar.
- .jpg
- .jpeg
- .png
- .webp
Project cover image: This is your book cover area. Only image files are allowed.
- .jpg
- .jpeg
- .png
- .webp
Marketing copy graphics: Store and keep track of all your ebook cover files, print cover files, promo graphics or ad creative all in one place. Now you'll never have to hunt through a hundred folders to find the files you need.
- Ebook cover: .jpg, .jpeg, .png, .webp
- Print cover: .jpg, .jpeg, .png, .webp, .pdf
- Promo graphic / ad creative: .jpg, .jpeg, .png, .webp, .pdf
Core Concepts
Chapters and Scenes
Scryla organises stories into chapters and scenes so you can plan structure clearly.
Chapters can contain:
• A title
• An optional subtitle
• A short overview
• Scenes pertaining to the chapter
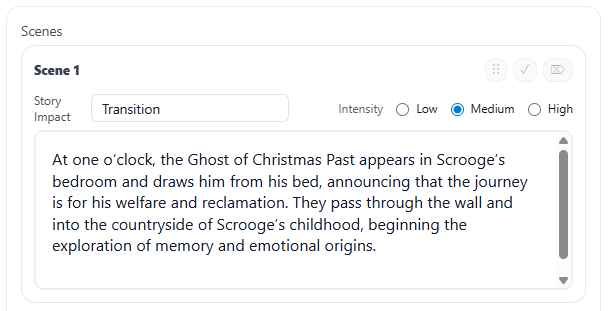
Scenes can be added within chapters and reordered freely as your structure changes.
You can also mark scenes as complete or archive them if you decide to change direction.
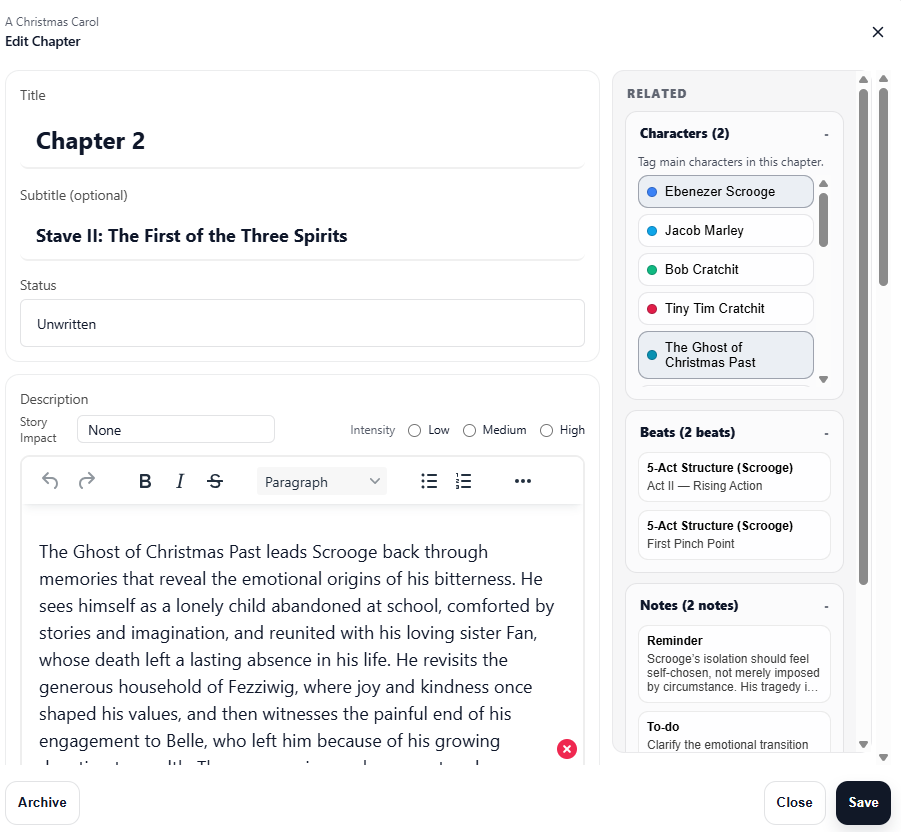
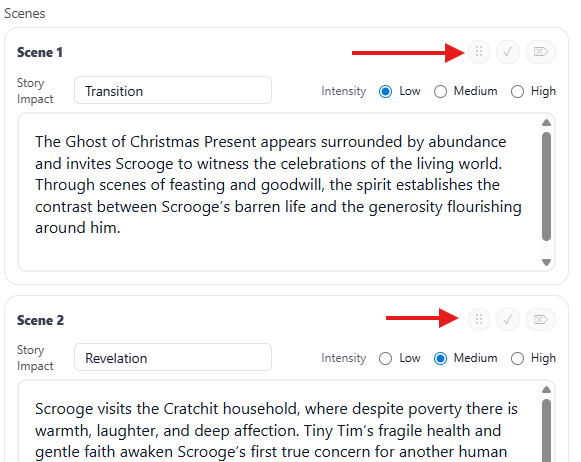
Story Impact and Intensity
Scenes in Scryla can include two optional narrative signals:
Story Impact: the type of narrative event happening in the scene
(for example: Revelation, Confrontation, Fallout).
Intensity: a rough indicator of how dramatically significant the moment is
(for example: Low, Medium, High).
These signals help you visualise pacing and structure, especially when using Timeline View.
Archiving vs Deleting
In Scryla, items are archived before they can be permanently deleted. This includes chapters, scenes, notes, and other project elements.
This two-step process helps protect your work from accidental deletion.
Because writing projects often evolve over time, ideas that seem unnecessary today may become useful again later. Archiving allows you to safely remove items from your active workspace without losing them permanently.
Archiving an Item
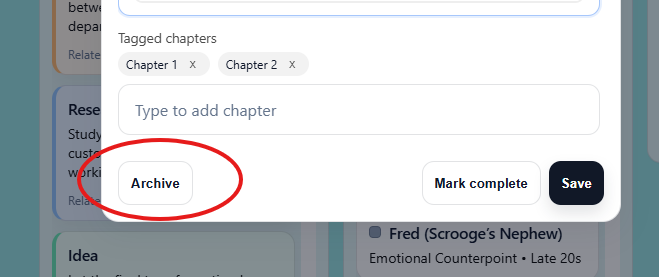
When you archive an item:
-
It is removed from the active board or view
-
It is stored safely in the Archive drawer
-
It can be restored at any time
This makes archiving ideal for:
-
Alternate scenes
-
Removed plot ideas
-
Draft notes you may want later
Permanently Deleting an Item
If you are sure you no longer need something, you can permanently delete it from the Archive.
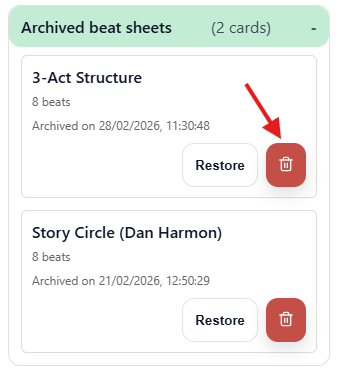
To do this:
-
Archive the item.
-
Open the Archive drawer from the Project menu.
-
Locate the archived item.
-
Select Delete permanently and then confirm your choice.
Once permanently deleted, the item cannot be recovered.
Why Scryla Uses Archiving First
Many writing tools allow immediate deletion, which can lead to accidental loss of work.
Scryla deliberately uses an archive-first approach to make it easy to:
-
Experiment with ideas safely
-
Remove clutter from your board
-
Restore earlier versions of your work if needed
This allows writers to stay organized without risking the loss of important material.
Many writers use the Archive as a temporary “idea graveyard” where unused scenes and notes can be kept in case they become useful later.
Reordering Chapters and Scenes
Scryla allows you to easily reorganize your story by dragging and dropping chapters and scenes.
This makes it simple to experiment with story structure as your outline evolves.
Reordering Chapters
To change the order of chapters:
-
Open your project in Board View.
-
Locate the Chapters column.
-
Click and drag a chapter card.
-
Drop it in the new position.
All scenes inside the chapter will move with it automatically.
Note: on mobile, tap and hold a chapter with your finger in order to move it.
Reordering Scenes
Scenes can also be rearranged within a chapter.
To move a scene:
-
Open the chapter containing the scene.
-
Click and drag the scene card's drag handle (the six dots on the top-right of each scene).
-
Drop it in the desired position.
This allows you to quickly test different story flows without rewriting or copying content.
Note: If you're planning a large structural change, consider archiving scenes instead of deleting them so you can restore them later if needed.
Views & Navigation
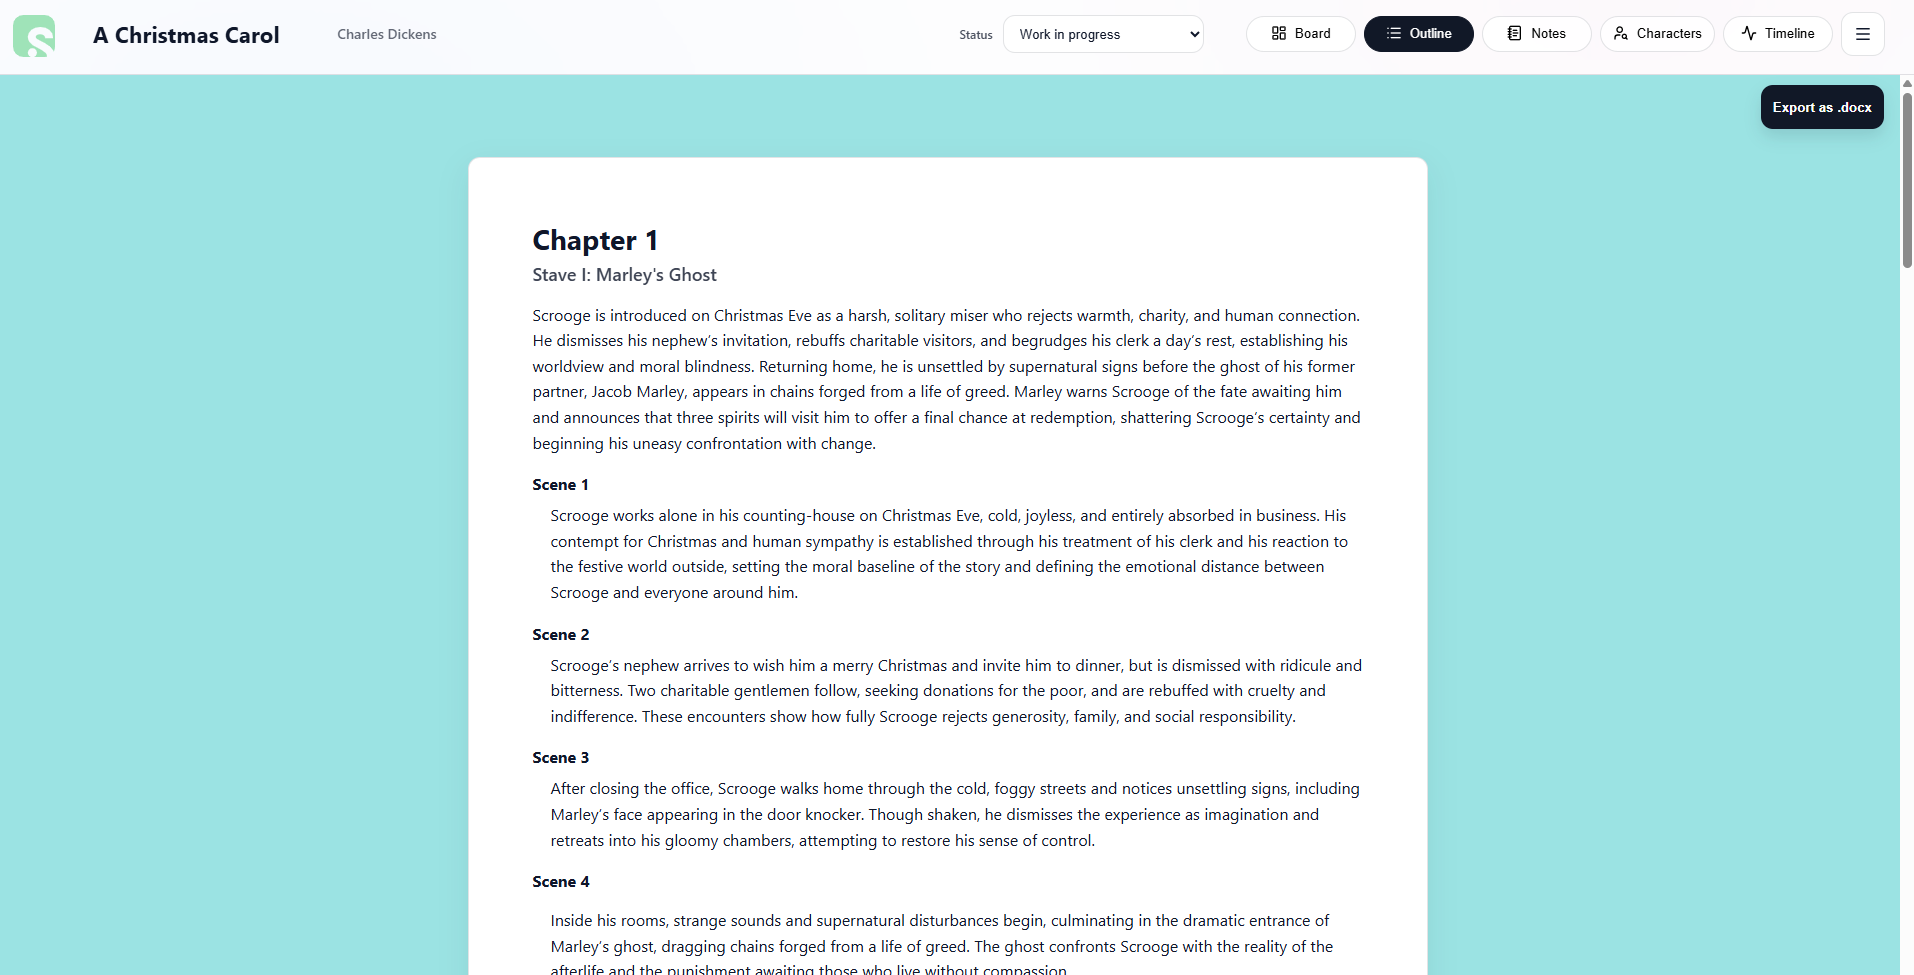
Outline View
The Outline View displays your entire story structure as a continuous document.
It includes:
• Chapter titles and subtitles
• Chapter overviews
• Scene descriptions
This view is ideal when reviewing structure or sharing your outline with editors or collaborators.
Note: You don't need to do anything with the Outline View. Your story outline is automatically built from the chapter overviews and scene descriptions you add in the Board View.
From the Outline View, you can click the "Export as .docx" button (top-right or bottom-center) to download the entire outline as an editable Microsoft Word document to either edit offline, review or share with others.
Timeline View
The Timeline View gives you a visual overview of your story structure.
It combines chapters, scenes, narrative signals, character arcs, and beats into a single timeline so you can quickly identify pacing issues or gaps in your narrative.
Clicking any chapter in the timeline jumps directly to that chapter in your project.
The Timeline View is split into two sub-views:
Narrative overview

The Narrative overview shows you a color-coded graph of your scenes or chapters, based on the intensity and story impact options you selected on the Board view. Block height reflects intensity, and color maps to impact. Scenes you haven’t tagged will default to Medium intensity and Transition impact. You cna use this graph to look for runs of low intensity (pacing lulls) or high intensity (fatigue/spike risk) that may suggest structural adjustments.
Note: low or high runs doesn't mean your story structure is wrong, that may be exactly what you intended, but the Narrative ovweview graph will help point out any lull or spike you hadn't previously accounted for.
Timeline structure
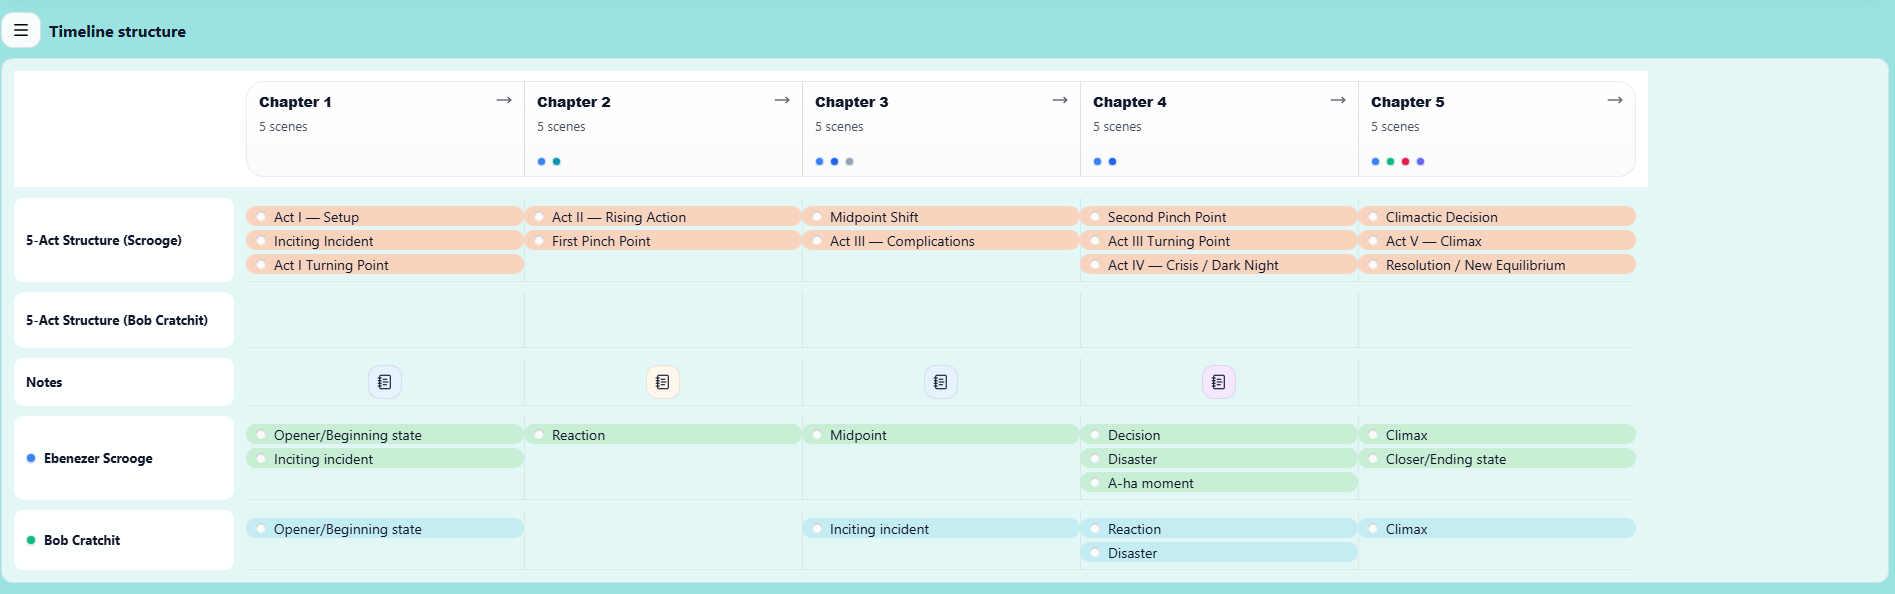
The Timeline Structure section helps you map story structure, character arcs, and notes against the progression of your chapters.
Each column represents a chapter in your project, allowing you to visualise how important narrative elements unfold across the story.
This section is designed to give you a high-level structural overview of your book while still letting you organise specific story beats.
Rows such as 5-Act Structure allow you to visualize major narrative beats along the timeline of your story (which you've chosen from the Beat Sheets section of the Board view).
Examples include:
-
Inciting Incident
-
Rising Action
-
Midpoint Shift
-
Second Pinch Point
-
Climax
-
Resolution
By attaching these markers under the relevant chapters, you can quickly see whether your story structure is balanced and whether key moments occur at the right point in the narrative.
You can also add multiple structural rows to compare different structural models or track alternative story frameworks.
Character Arcs
Character rows allow you to track how individual characters develop across the story.
For example, you might mark:
-
A character’s inciting moment
-
Key reactions or decisions
-
Moments of failure or revelation
-
Their final climax or transformation
This helps ensure that character development progresses alongside the main plot rather than disappearing for long stretches of the story.
Notes
The Notes row allows you to add reminders, world-building ideas, or structural comments tied to a specific chapter.
These notes can be used to track pacing issues, unresolved plot threads, or ideas that may need to be developed later.
Tag notes against specific chapters in the Notes column of Board view, or from the Notes view.
Why Use Timeline Structure?
The Timeline Structure view is designed to help you answer questions such as:
-
Do my major plot beats occur at the right points in the story?
-
Do my character arcs evolve consistently throughout the narrative?
-
Are there chapters where nothing significant happens?
-
Are key characters disappearing for too long?
By seeing everything aligned across the chapter timeline, you can quickly identify pacing problems or structural gaps.
Characters & Notes
Character Profiles
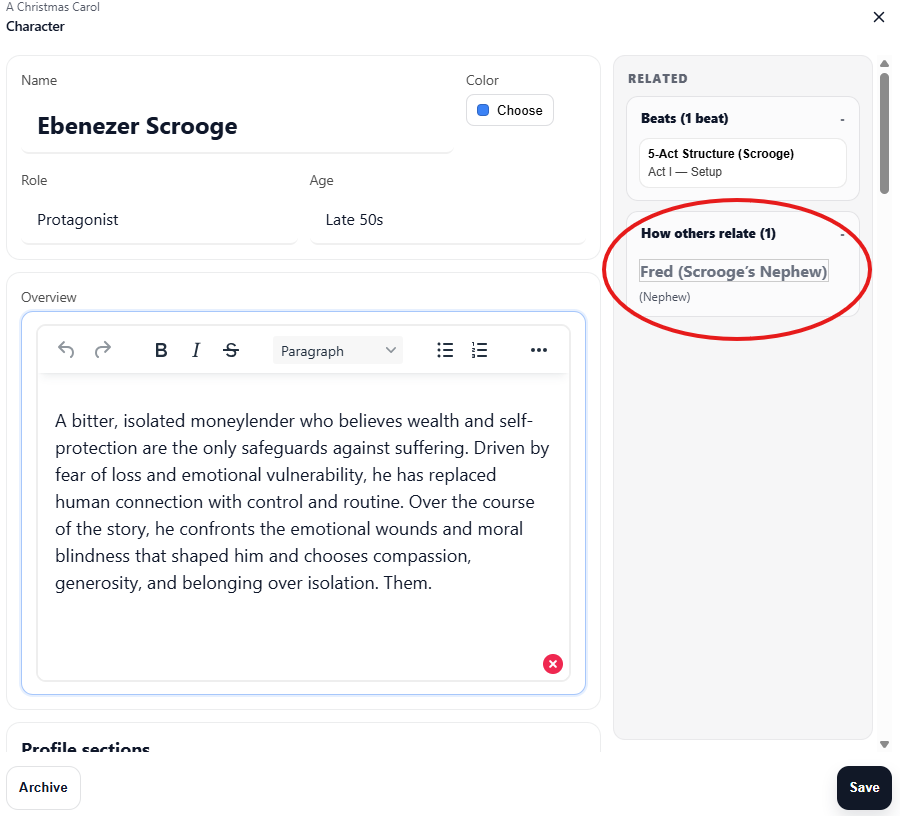
The Characters tab lets you store important information about the people in your story.
Character profiles can include:
• Overview
• Appearance
• Personality
• Backstory
• Motivations and goals
• Inner conflicts or secrets
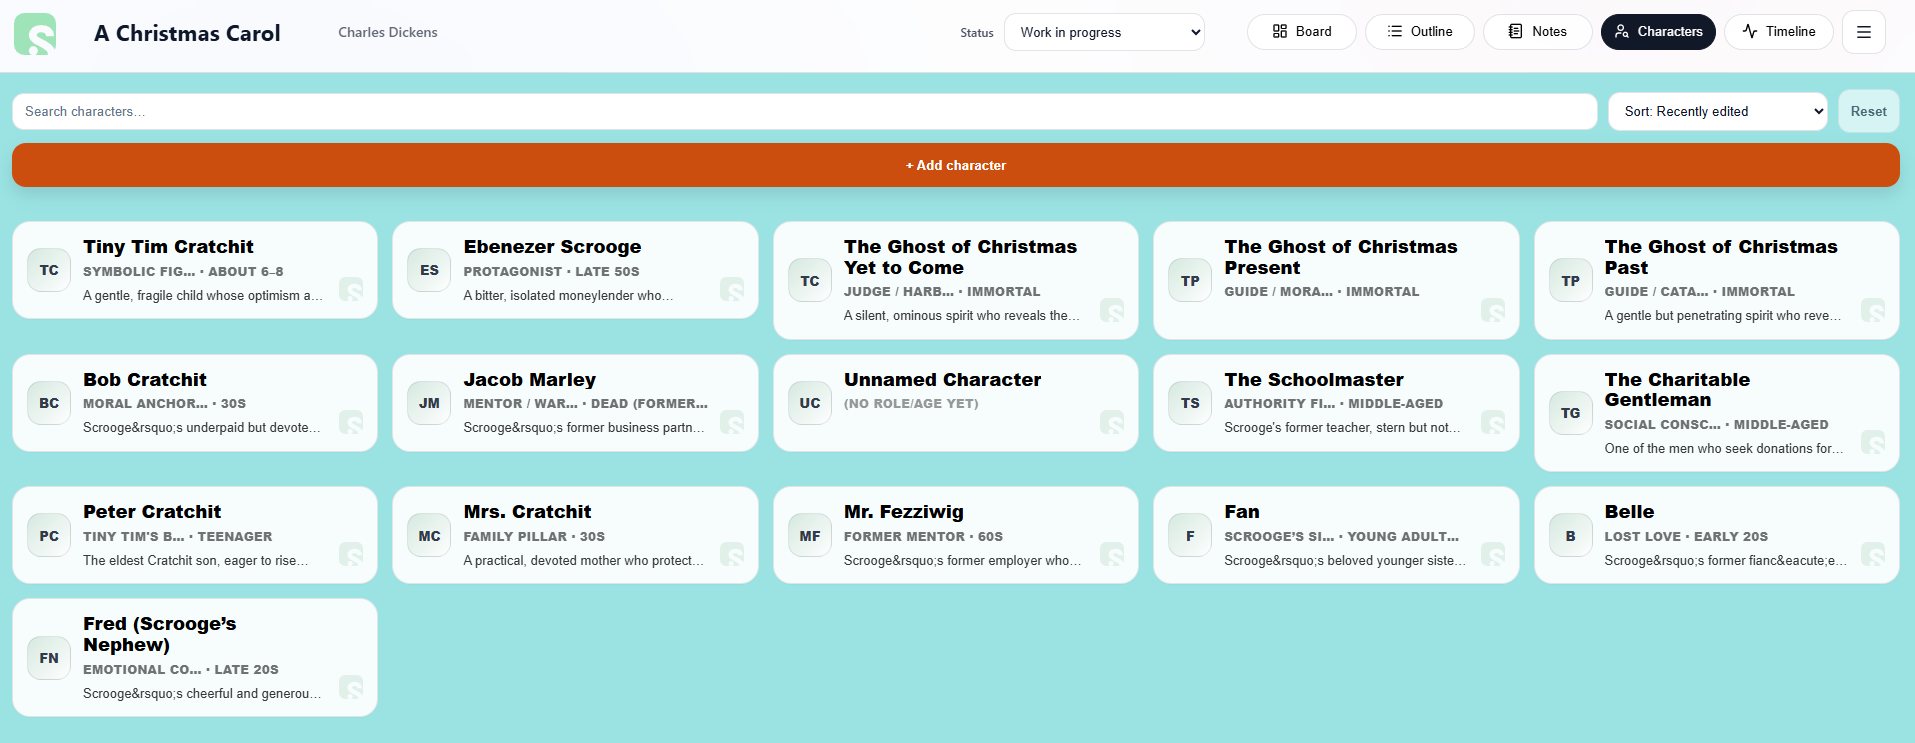
You can also create custom sections to track additional information.
Additionally, Scryla alows you to tag relationships across characters.
In-Project Notes
The Notes tab inside a project allows you to store ideas, reminders, and planning details that relate specifically to that story.
Unlike chapters or scenes, notes are not part of the narrative structure. Instead, they act as a flexible space for planning and reference material.
You might use project notes for:
-
Plot ideas you want to explore later
-
World-building details
-
Reminders about character motivations
-
Questions that need answering in later drafts
-
Research notes related to the story
Notes can be added, edited, and reorganized as your project develops.
Because notes belong to the project, they remain available whenever you return to work on that book.
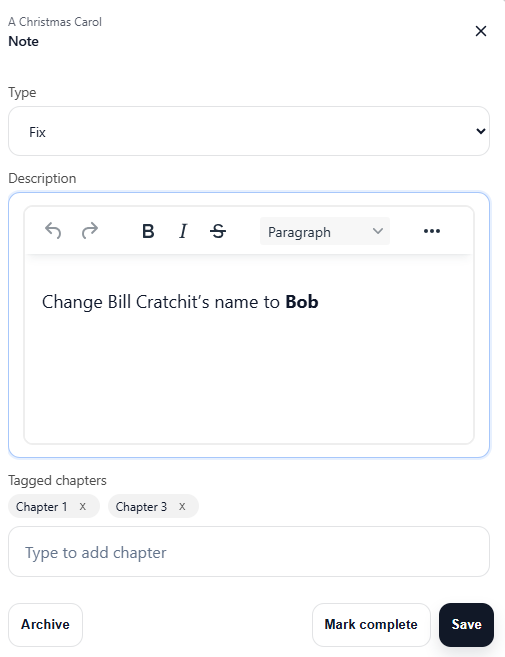
You can choose from the following note types:
-
Reminders
-
Research
-
Ideas
- To-Dos
- Questions
- Fixes
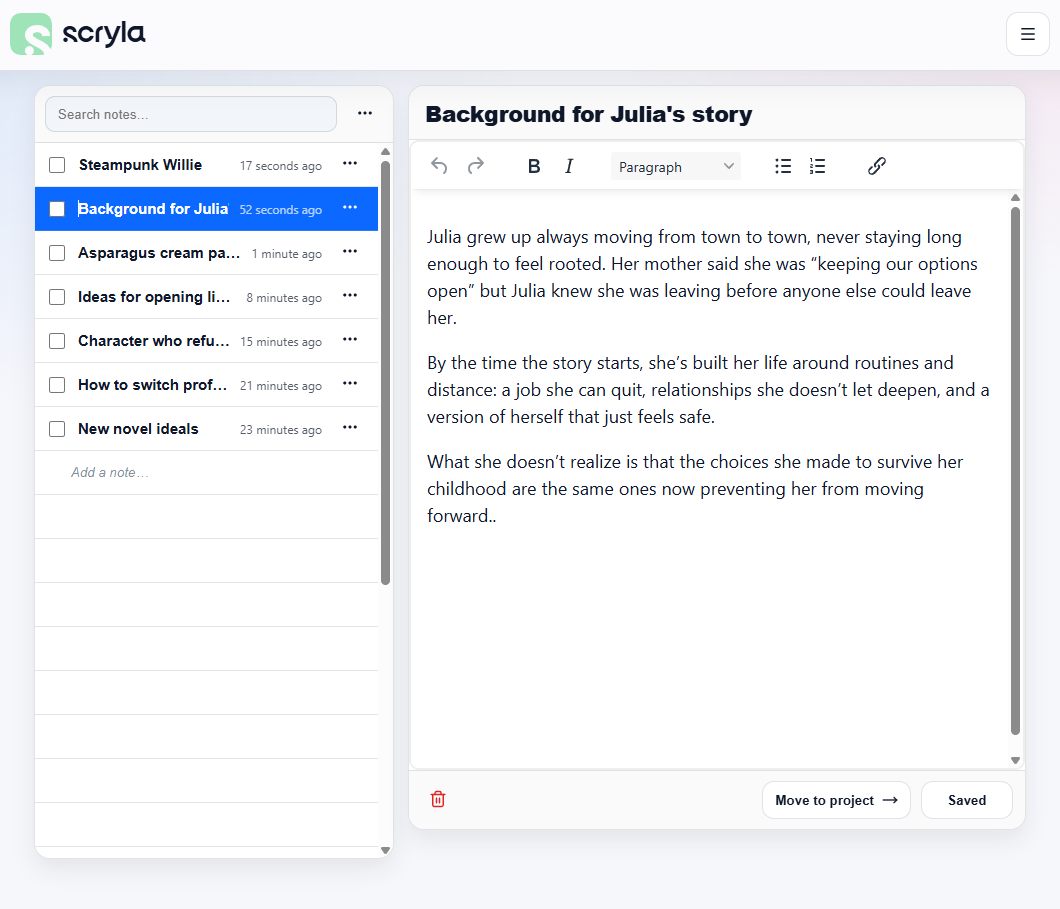
Your Personal Notebook
The Notebook is a workspace for ideas that are not tied to any specific project.
It acts as a central place to capture thoughts, story ideas, research notes, or fragments of inspiration before you decide where they belong.
Many writers use the Notebook to store:
-
New story ideas
-
Character concepts
-
World-building notes
-
Research material
-
Plot ideas that may become future projects
Notes stored in the Notebook can later be moved to a new or existing Project when you have the need to use them.
This allows you to keep your creative ideas organized without needing to immediately create a full project structure.
Exporting Your Outline
Exporting to DOCX
When you’re ready to review your structure offline or share it with collaborators, you can export your outline.
Scryla generates a clean DOCX document containing:
• Chapter titles
• Chapter overviews
• Scene descriptions
This makes it easy to send your story outline to editors or import it into drafting tools.
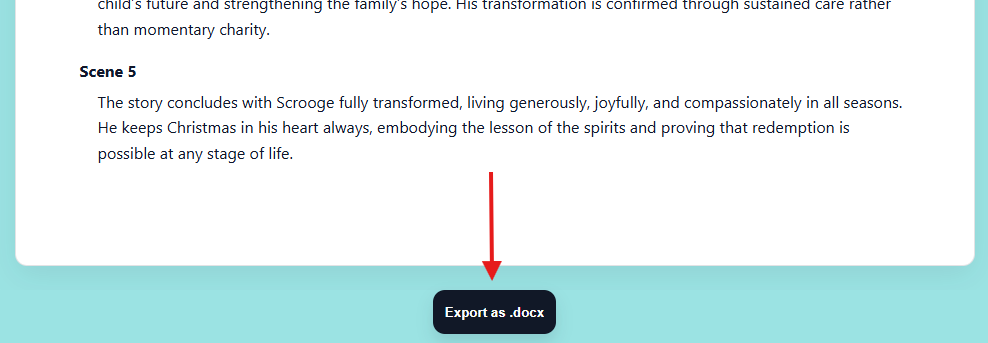
Simply click the Export as .docx button from the Outline view to download your complete outline.